This article is separated into two parts, how to select recipients, and how to confirm and schedule.
Part 1 – How to select recipients
Selecting recipients allows you to define who your communication will be sent to. In the select recipients stage of the send process, you can define who you’re sending to and, if you’re using multiple channels, how they will receive it.
Navigation: Communications > Create New > Email > SMS > Who
Step 1: Select who you’re communicating to
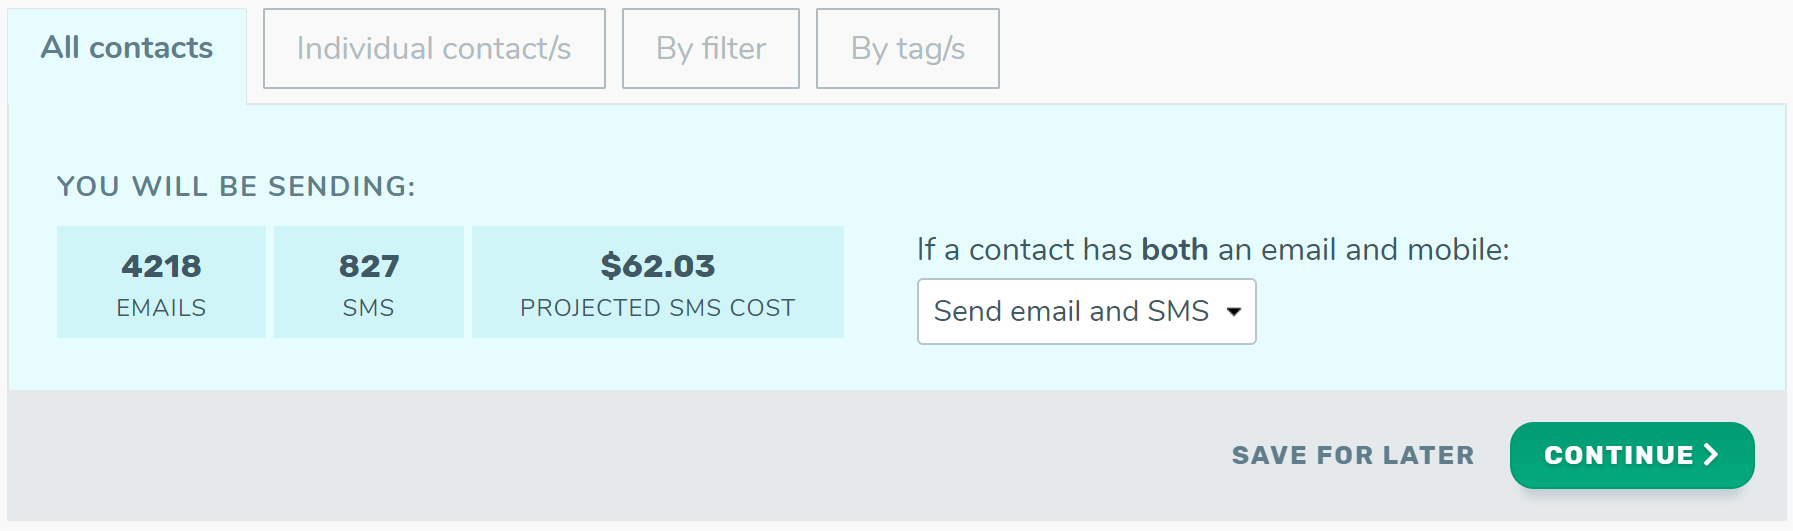
- Select from the four recipient tabs: all contacts, individual contacts, by a filter, or by tag.
- Define your recipients using the options available in the tab.
Step 2: Select how they will receive the communication (optional)
- If sending via email and SMS you will need to select how to send to contacts who have both an email and a mobile number in their profile. Your options are:
- Send them an email and an SMS.
- Send then an email only.
- Send them an SMS only.
Step 3: Check your recipient count
- Review the number of emails.
Step 4: Continue
- Click to continue in the bottom left of the page.
Part 2: How to confirm and schedule
Scheduling and reviewing your communication is the last part of the sending process. In this stage, you will select a send time, thoroughly review that the details and content of your communication are correct, and launch your communication.
Navigation: Communications > Create New > Email > SMS > Who > When
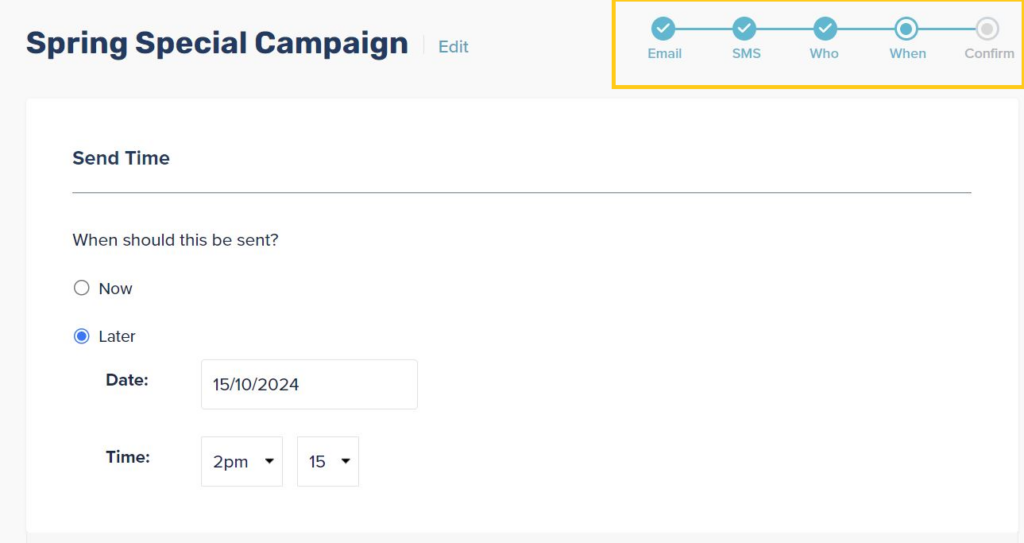
Step 1: Select a date & time for your send
- Select a send time, either now (sending as soon as you’ve confirmed your communication) OR later.
- If later, select your date & time using the dropdown options provided.
- Click continue to move to the confirm stage of your send.
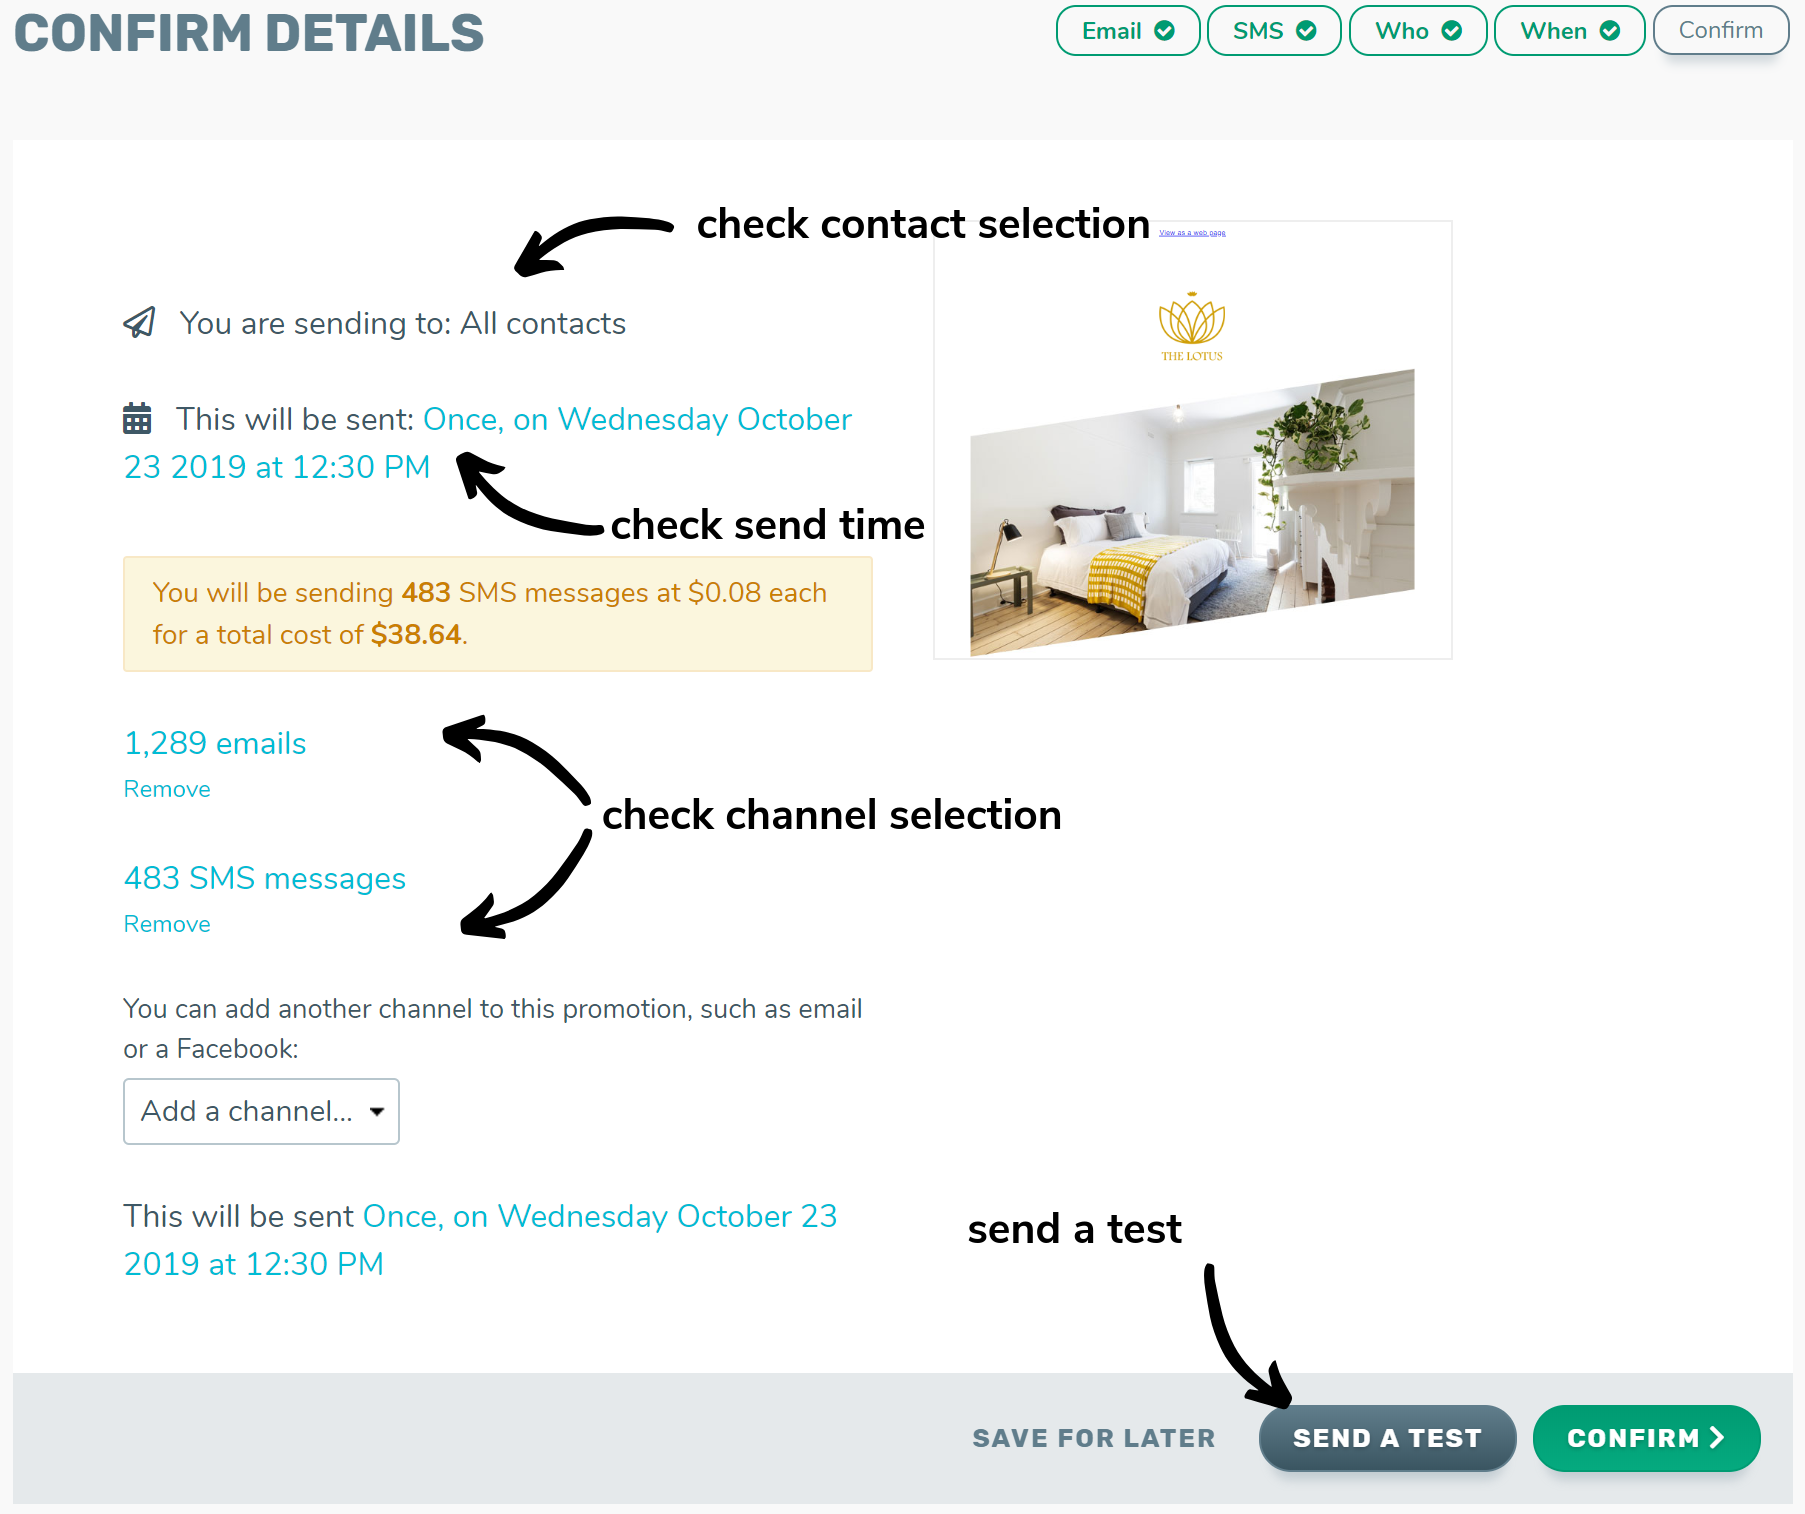
Step 2: Review the details of your send
- Check that the correct contacts have been selected.
- Check that the send time is correct.
- Check that the send channels are correct.
- Send a test to yourself to check the content.
- If all of the above is correct proceed to the next step otherwise, you can:
- Save your communication for later.
- Remove and add channels to your communication.
- Navigate back to any stage of the sending process.
Step 3: Confirm & launch
- Click the confirm button in the lower left of the page.
- Read through the details in the pop-up.
- Click launch to send or schedule (if a later date & time has been selected) your communication.
Watch the next view in our TalkBox training series on ‘Sent communication reports’ here.