Whether you are a new user or you need a reminder for how to upload contacts, these steps are for you.
Create and upload your first contact in these steps.
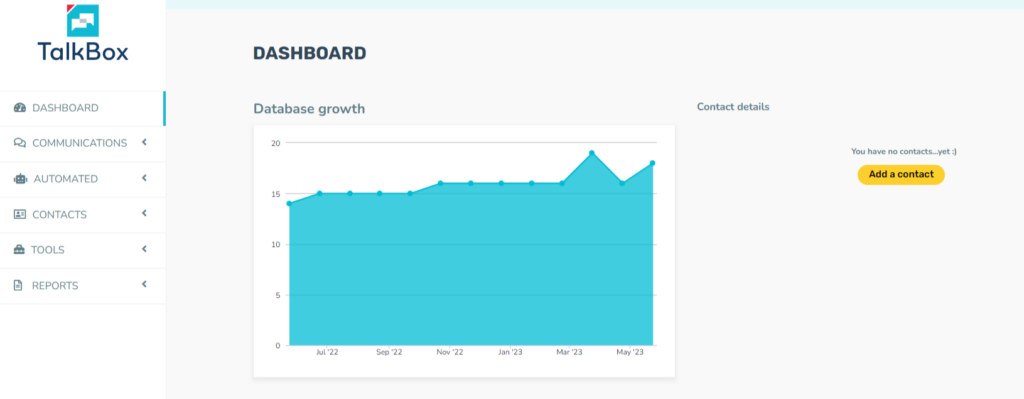
Navigation: Dashboard >
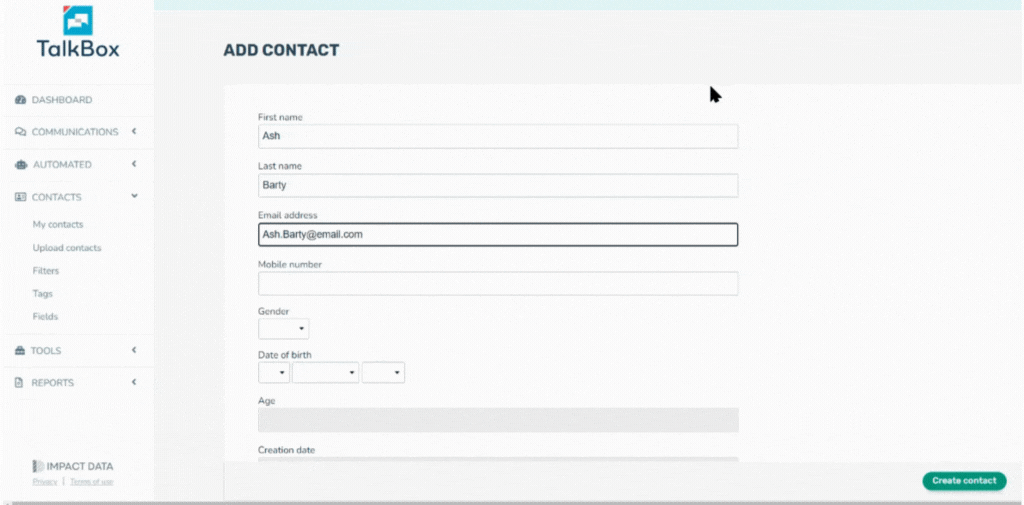
Navigation: Dashboard > Add a contact > Create a contact
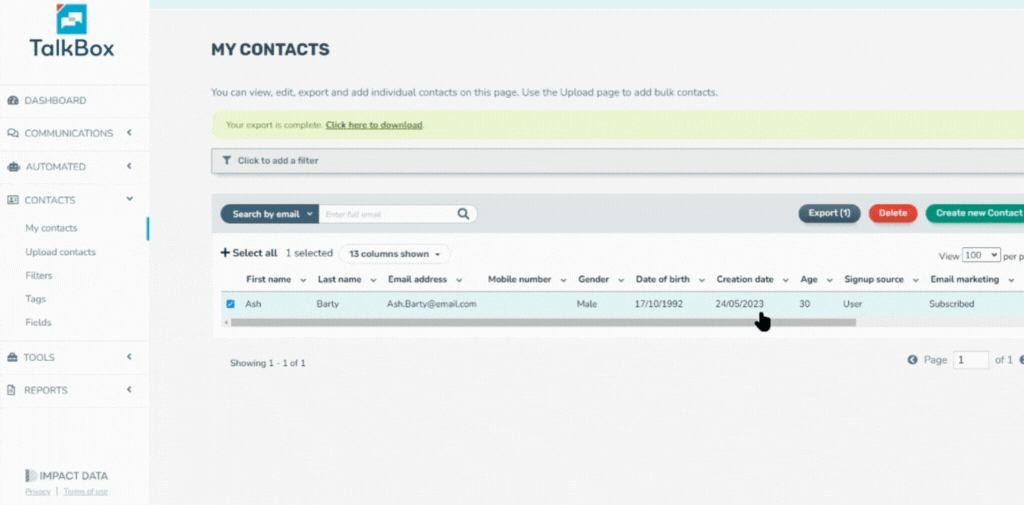
Navigation: Select newly created contacts > Export
A CSV (comma-separated-values) will be downloaded to your local device.
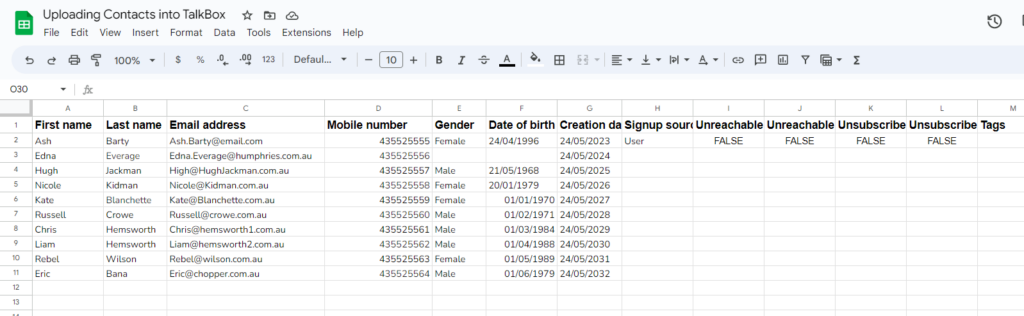
Import your contact CSV file to Google Sheets or Microsoft Excel and fill in the sheet with your contact data. Make sure to keep the headings as is.
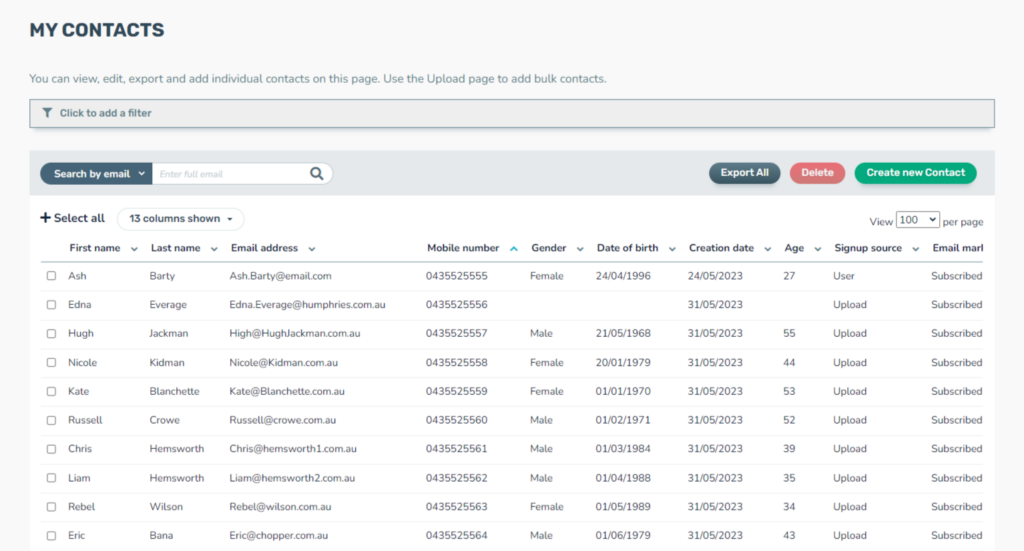
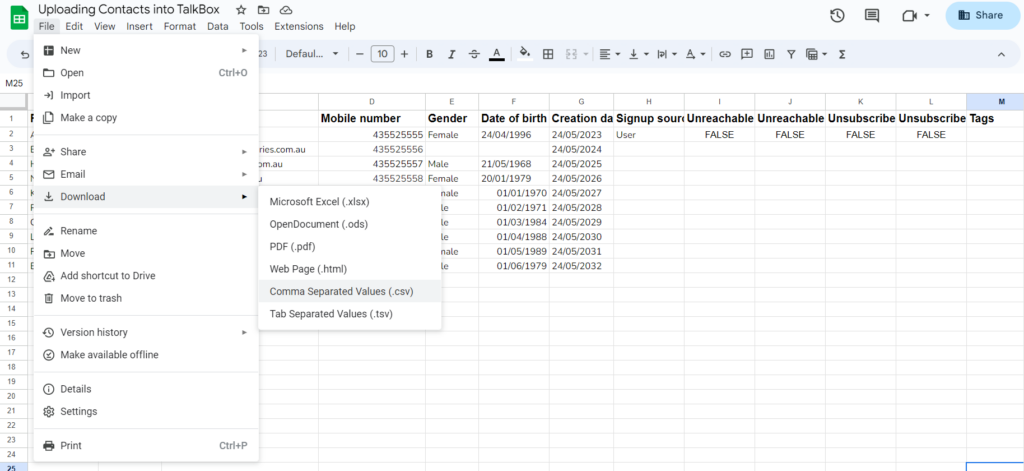
Download your contacts as a CSV file to your device.
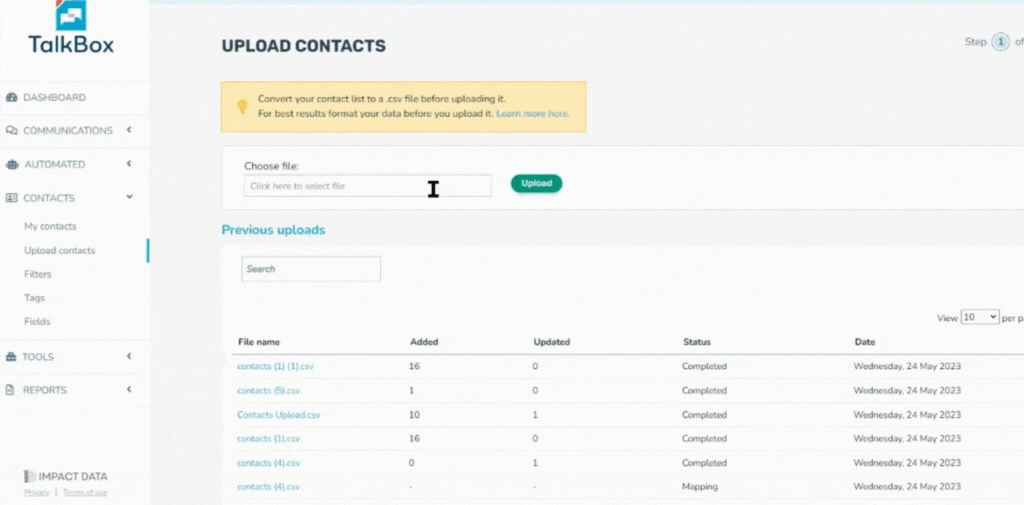
Now upload your contacts to TalkBox.
TalkBox has a maximum upload limit of 10,000 contact rows. If an upload file exceeds this limit, the upload will error and none of the contact rows will be uploaded or updated.
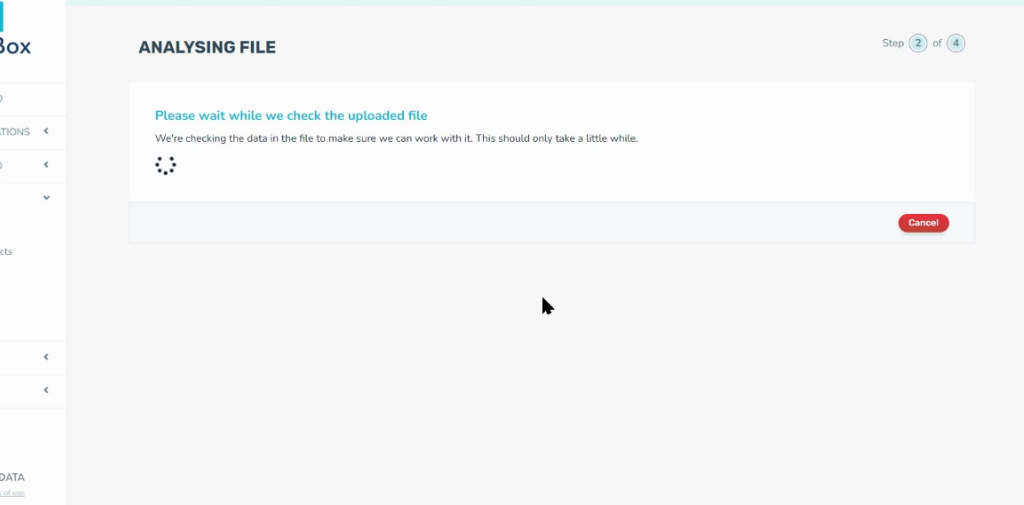
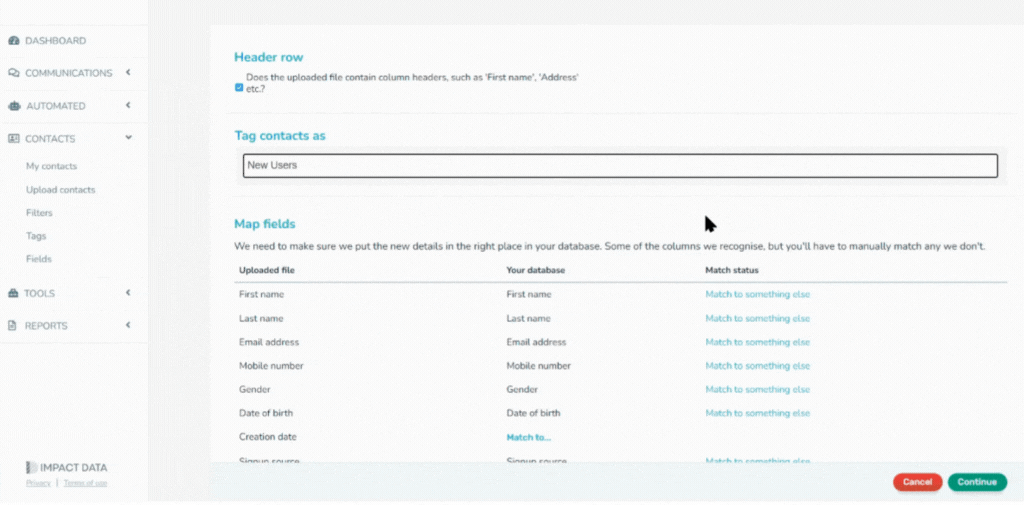
Wait for TalkBox to check if the data is compatible.
Some fields will automatically be mapped based on the field name in your spreadsheet.
Some unique fields will not be mapped. Feel free to skip the Mapping of Fields and come back later
Tag your contacts with a name that has meaning for your business.
Click Continue
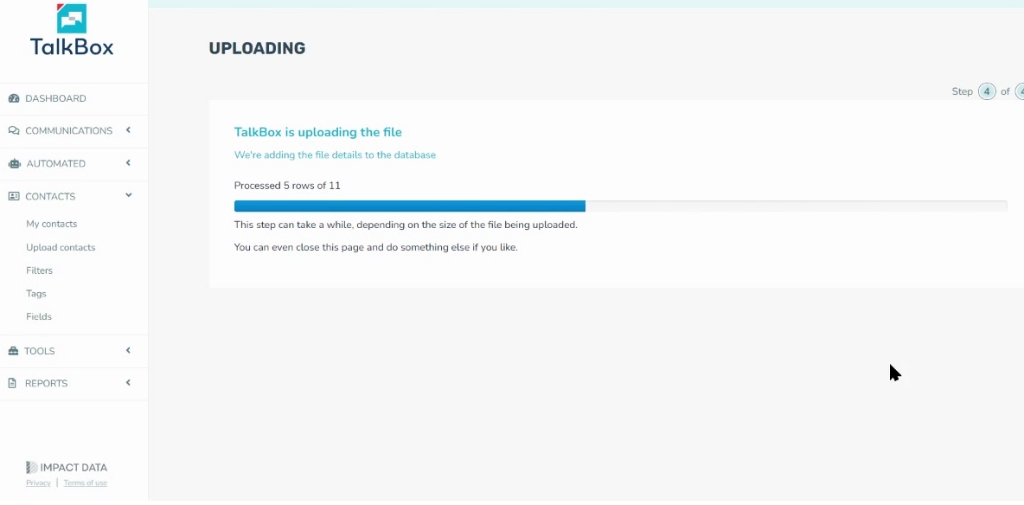
Depending on the size of the contact list it could take a few minutes.
Check if the first and last names are mapped to the correct emails and mobile numbers.