TalkBox vouchers can be integrated so that a TalkBox voucher can be backed by a SwiftPOS voucher. This means vouchers created and issued from TalkBox can be scanned at a SwiftPOS terminal and have all the features of SwiftPOS vouchers. To do this, a voucher is created in each system and the TalkBox voucher is given the ID of the SwiftPOS voucher, this connects the vouchers from the two systems. These composite vouchers:
- Can be issued by TalkBox.
- Can be scanned and redeemed at a SwiftPOS terminal.
- Support native SwiftPOS voucher functionality.
To set this up you need to configure two vouchers, one in each system. This article shows how to complete this configuration for existing TalkBox and SwiftPOS users in 4 steps.
Note: that this is only available in SwiftPOS Touch version 6 and above.
Step 1: Create a SwiftPOS voucher
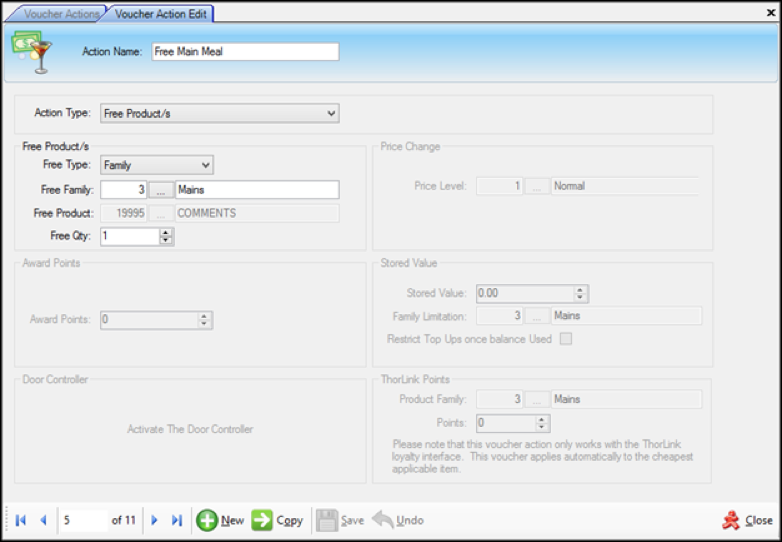
- Navigation in SwiftPOS Back Office: Vouchers/Raffles/Discounts > Voucher Actions.
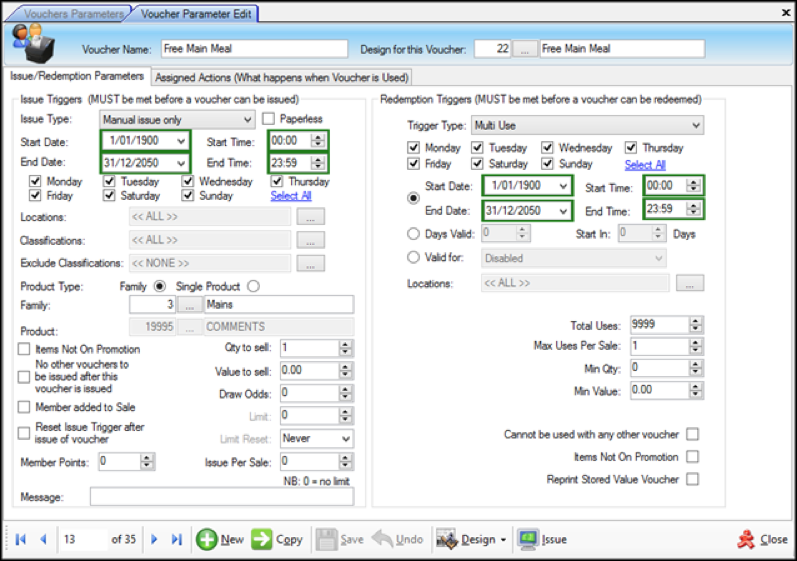
- Set your vouchers parameters:
- Voucher name – enter a meaningful name here.
- Design for your voucher – select any design (it will not be used for TalkBox vouchers).
- Set the issue trigger:
- Issue type – set to manual issue only.
- Product type – select the family or single product that the voucher is valid for.
- Qty to sell – Set to 1.
- Set the redemption trigger:
- Trigger type – set to multi use.
- Start & end date – Set this period for as long as possible (voucher expiry is handled by TalkBox).
- Total uses – set this to 9999.
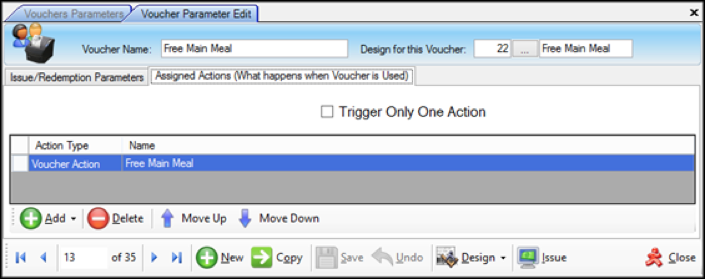
- Issue a voucher from the back office to create an entry into the Voucher Ledger.
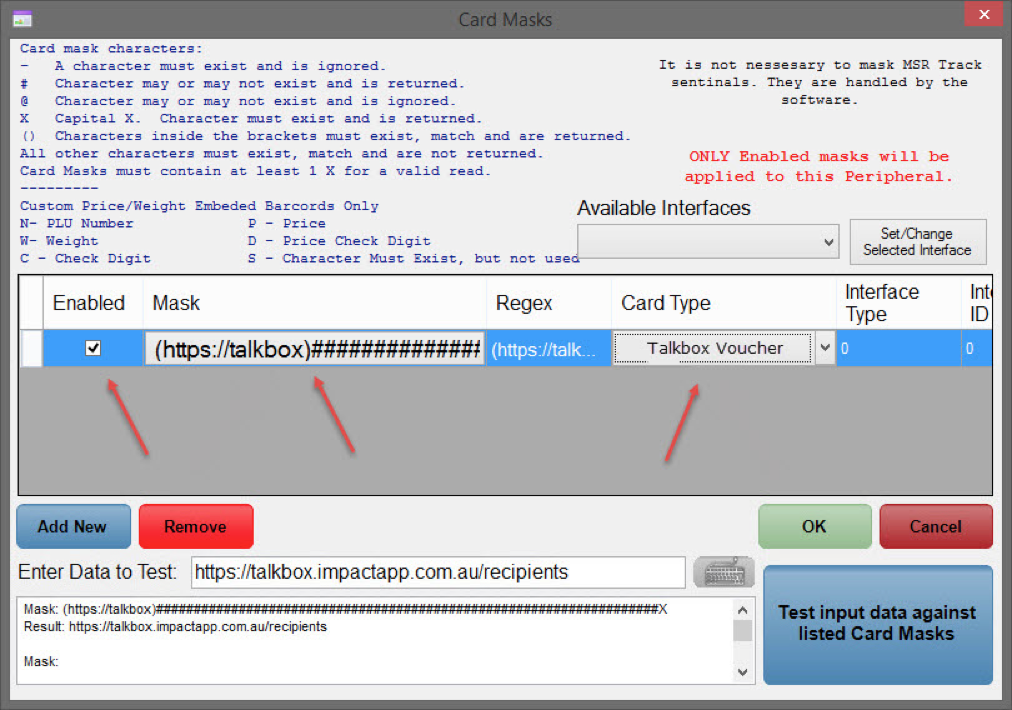
Step 2: Configure the SwiftPOS terminal
- Navigation to in SwiftPOS Touch: Tools > Basic Tools > Terminal Settings > Peripheral List > Barcode Scanner > Edit.
- Click Set Card Masks and add a TalkBov Voucher card type.
- Enter the mask: (https://talkbox)#####X, containing 135 # symbols to handle the URL length.
- Check the enabled checkbox.
Step 3: Create a TalkBox voucher
- Navigation in TalkBox: Tools > Vouchers > Create New Voucher.
- Add the details of your TalkBox voucher.
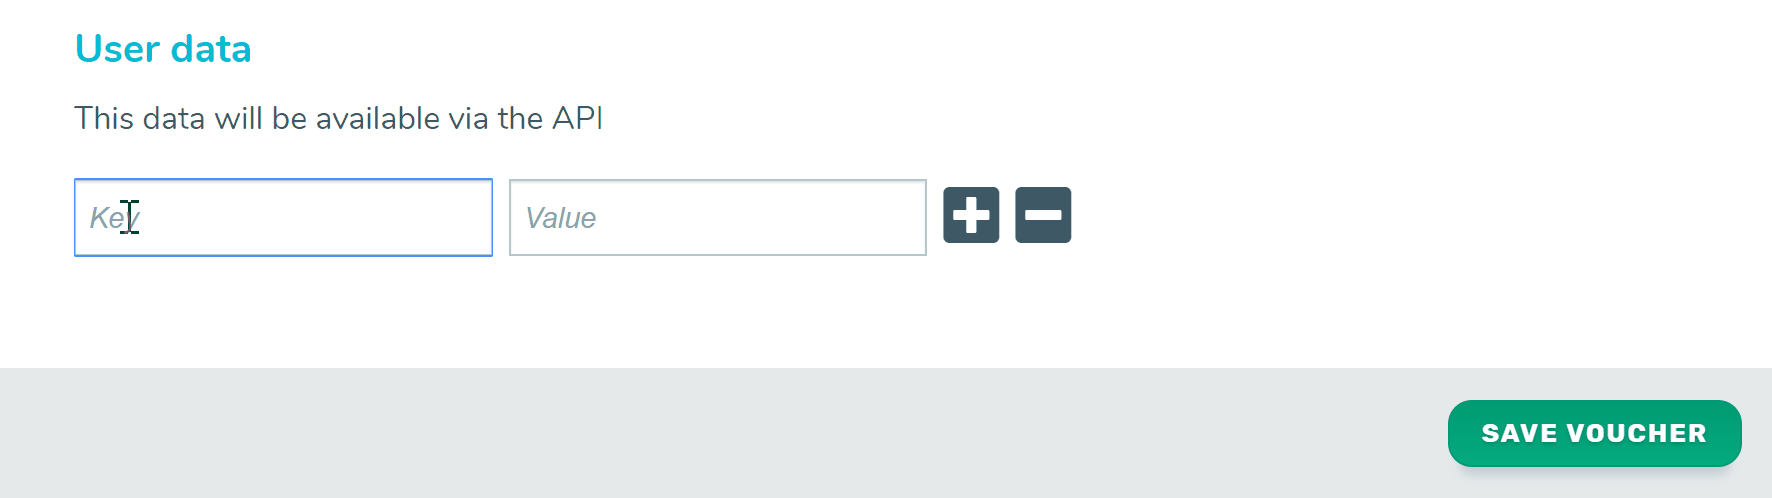
- Add your SwiftPOS specific user data to link your voucher:
- Key: voucher_id
- Value: the ID value as per the voucher ledger in your SwiftPOS Back Office suite.
Step 4: Test your voucher scanning
- Navigation in TalkBox: Communications > Create New.
- Drag & drop your voucher into an email communication.
- Send a test communication to yourself containing the voucher.
- Scan the QR code in your email at your SwiftPOS terminal, the voucher will be automatically recognised if the setup is successfully completed.
- Click to redeem your voucher.