TalkBox vouchers can be integrated so that a TalkBox voucher can be backed by a BePoz voucher. This means vouchers created and issued from TalkBox can be scanned at a BePoz terminal and have all the features of BePoz vouchers. To do this a voucher is created in each system and the TalkBox voucher is given the id of the BePoz voucher, this connects the vouchers from the two systems. These composite vouchers:
- Can be issued by TalkBox.
- Can be scanned and redeemed at a BePoz terminal.
- Support native BePoz voucher functionality.
To set this up you need to configure two vouchers, one in each system. This article shows how to complete this configuration for existing TalkBox and BePoz users in 4 steps.
Note: that this is only available in BePoz version 4.6 and above.
Step 1: Configure Bepoz backend
Impact Data Features
To access and configure ImpactData Features, the following Operator Privileges will need to be enabled in the Bepoz backend:
- Operator Maintenance ‘General’ Tab
- System Setup: “Maintain Venue, Stores & Tills” Flag
- SystemSetup: ” Access Venue Stores & Tills” Flag
- Operator Maintenance ‘Marketing & Promotions’ Tab
- Promotions: “Maintain Voucher Setup” Flags
Till Extension
To create the Impact Data Till Extension, log into BePoz BackOffice and complete the following steps:
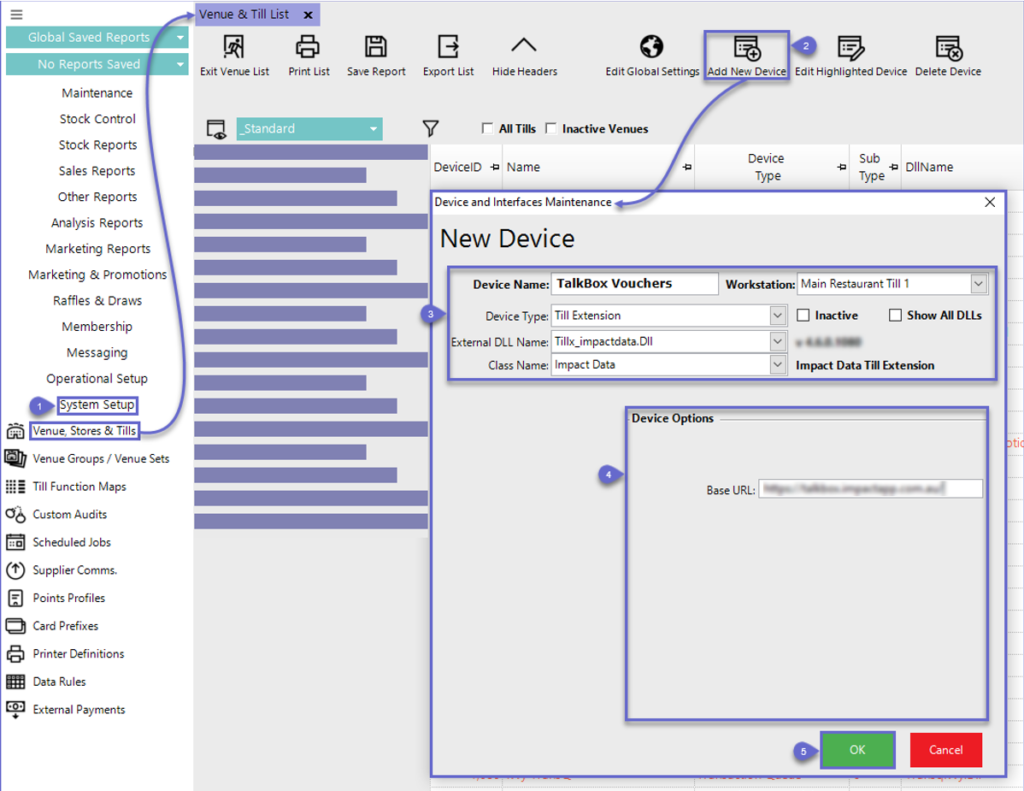
- Navigation: System Setup component in the sidebar> Venue, Stores & Tills to open the Venue Stores and Tills List tab
- Highlight the desired Till and click on the Add New Device button at the top of the tab; when prompted select ‘Blank Device’ and a New Device and Interfaces Maintenance window will open.
- Enter a relevant Device Name, set the Device Type to ‘Till Extension’, the External DLL Name to “Tillx_impactdata.Dll” and the Class Name to ‘Impact Data’
- Configure the Device options as follows:
- Base URL: Input https://talkbox.impactapp.com.au/ here
- Click OK to save the Till Extension
Step 2: Create a BePoz voucher
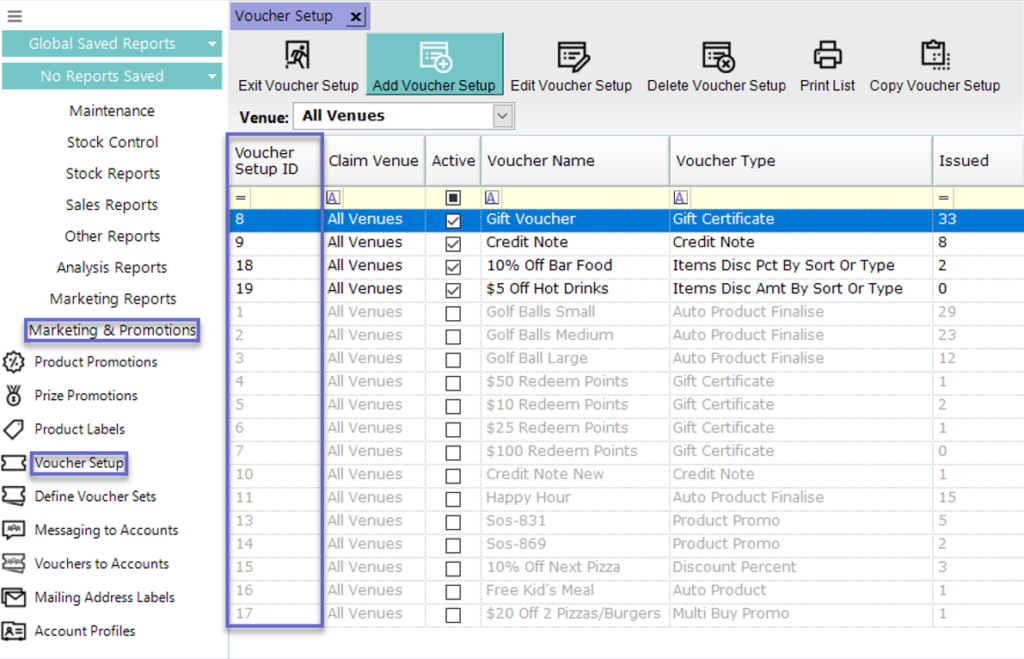
- Navigation in BePoz BackOffice: Marketing & Promotions > Voucher Setup > Add Voucher Setup
- Set your voucher parameters such as Voucher name, Voucher Type and Expiry.
- Once you have created your BePoz voucher, take note of the number in the Voucher Setup ID column for your voucher. This will be required when setting up the voucher in TalkBox.
Step 3: Create a TalkBox voucher
- Navigation in TalkBox: Tools > Vouchers > Create New Voucher.
- Add the details of your TalkBox voucher.
- Add your Bepoz specific user data to link your voucher:
- Key: voucher_setup_id
- Value: The Voucher Setup ID as per the voucher ledger in your BePoz Back Office.
Step 4: Test your voucher scanning
- Navigation in TalkBox: Communications > Create New.
- Drag & drop your voucher into an email communication.
- Send a test communication to yourself containing the voucher.
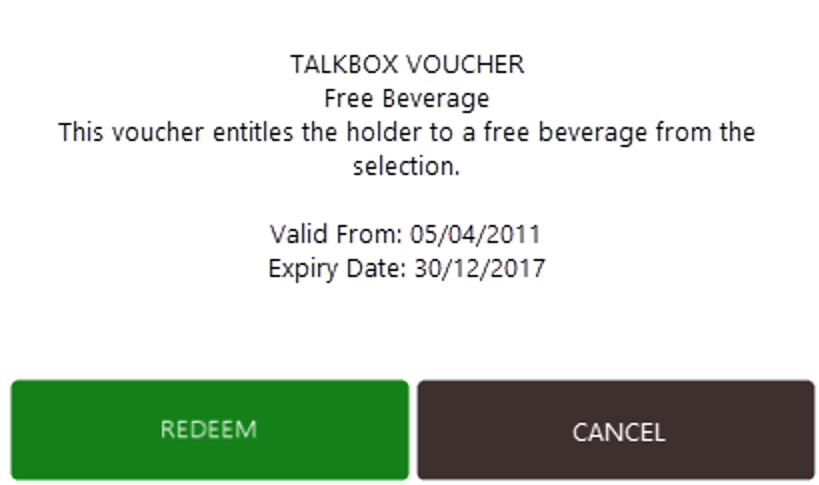
- Scan the QR code at your BePoz terminal, the system will validate the voucher and your terminal will display the voucher information.
- Click to redeem your voucher