An Update Details Campaign is an effective way to fill in the gaps in your existing database.
These campaigns prompt customers to provide specific details about themselves that can boost the relationship with your business through more personalised marketing.
With more contact details, you can further segment your audience and target for key events and build lucrative function business.
Before setting an automated promotion, we recommend starting with a Hosted Form, which will later be linked to your flyer.
Step 1. Create a Hosted Form
Navigation: Tools > Forms > Hosted Forms > Create New
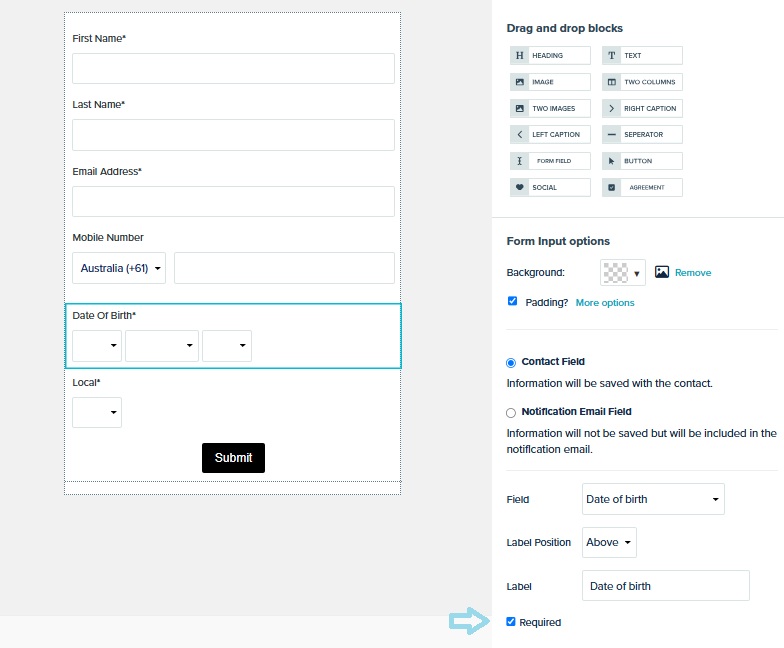
In the form editor:
- Add field blocks using drag and drop.
- Tick ‘Required’ for key fields, as needed.
- Tick ‘Required’ for the necessary fields, as shown in the image below
- Style your form to match your brand (e.g. upload a banner with your logo, update hex codes for button and background colours).
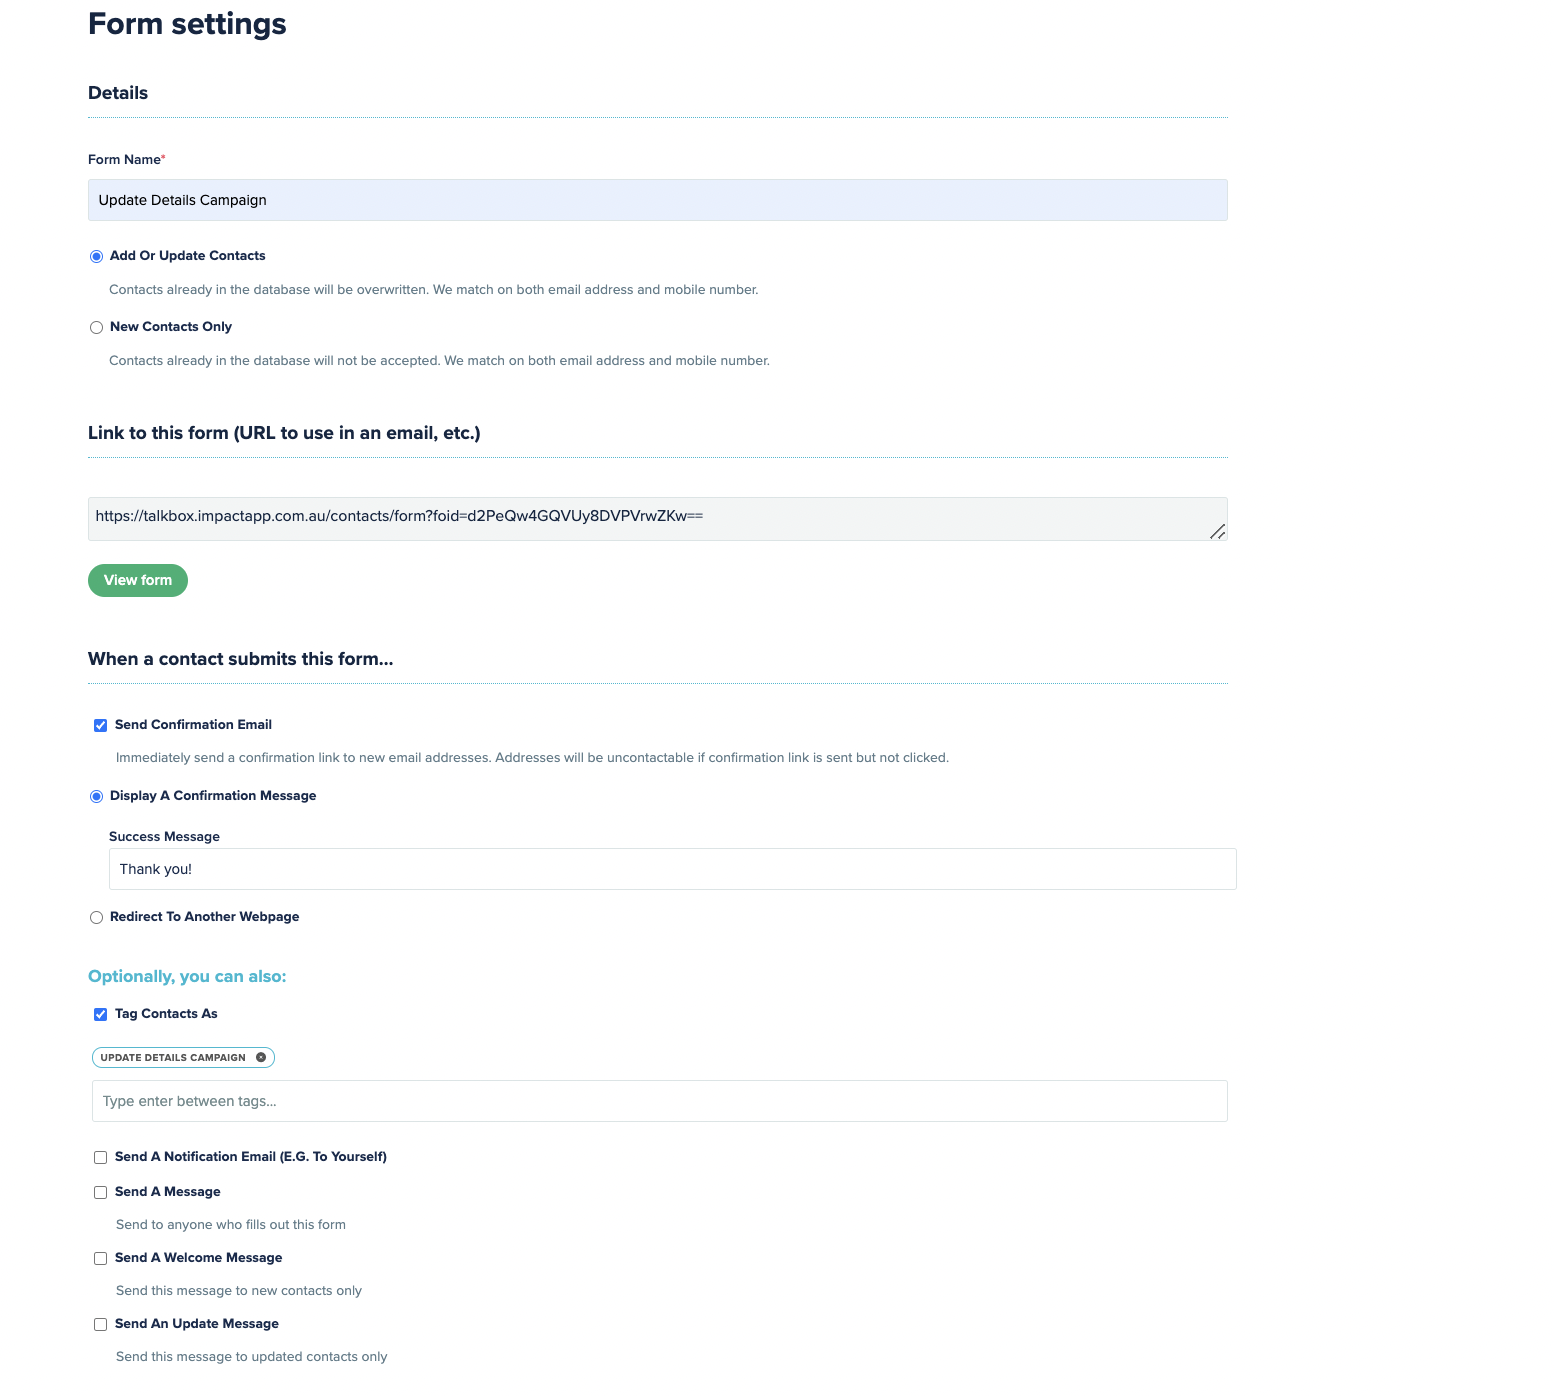
- Once complete, click ‘Continue’ in the top right corner to move to form settings.
- In the settings, add actions such as displaying a confirmation message or tagging recipients upon form submission.
Step 2. Create a Date Triggered Communication
Navigation: Automated > Date Triggered > Add new
- Name your communication (only visible to you).
- Select your channels: Email and/or SMS.
- Design your flyer.
When designing your flyer:
- Place a strategically located CTA (Call to action) button using the drag-and-drop editor.
- Select the button block to access its settings.
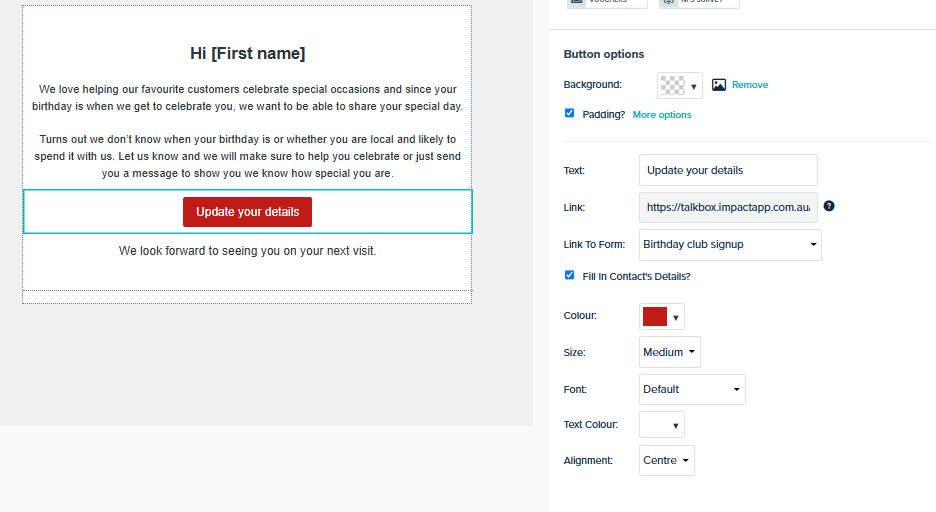
In the Button Settings:
- Text: Name your CTA button.
- Link: Skip this step; you’ll link your form instead.
- Link to Form: Use the search bar to find and select your hosted form. Tick the ‘Fill in Contact Details’ box to prefill known information.
- Style Options: Customise the colour, size, font, text colour, and alignment to match your design.
- Continue to > Preview your flyer on different devices.
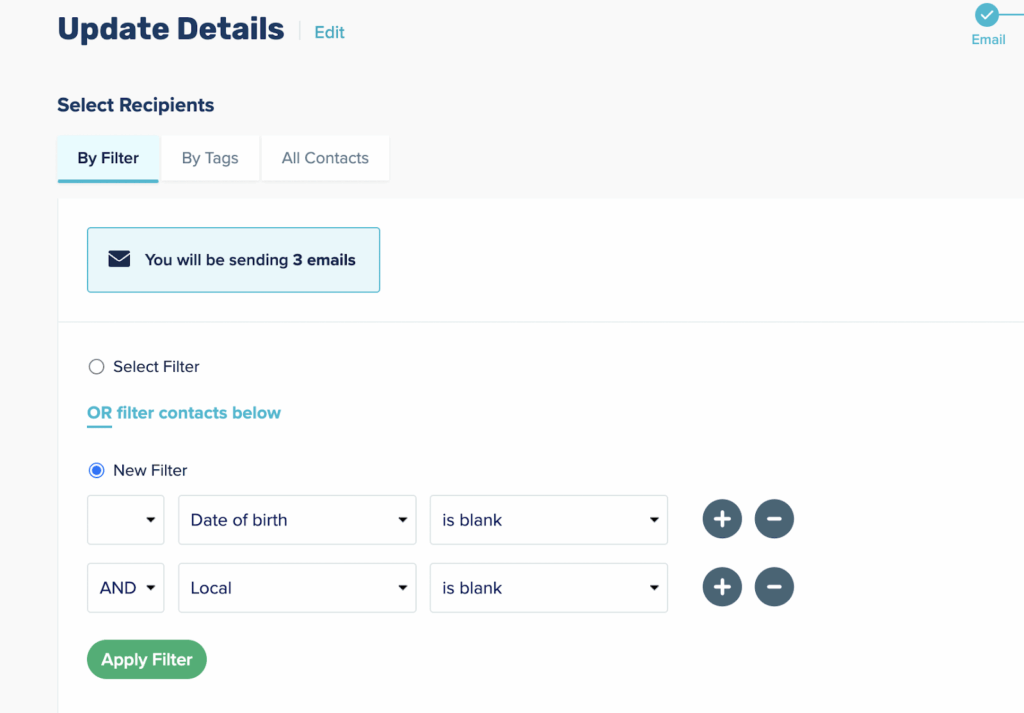
- Continue to > Select Recipients > By Filter:
- Add your filter under the statement ‘OR filter contacts below.’
- Choose the field with missing data and apply the rule ‘Is Blank.’
Example: To collect missing ‘date of birth’ and ‘local’ information, set the filters as: Date of Birth is blank + AND Locals is blank.
Note: This helps you collect multiple missing details at the same time. See example image below.
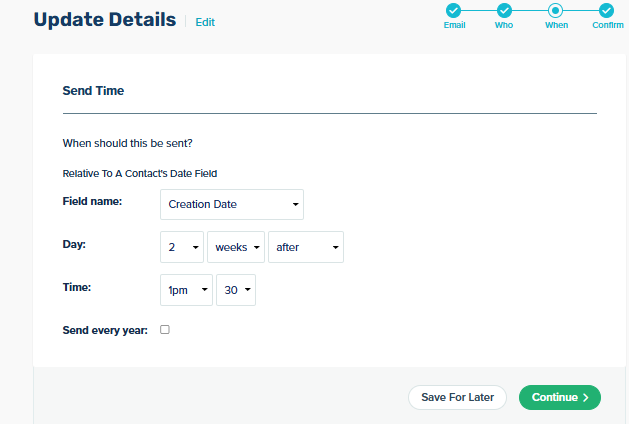
- Continue to > Send Time: Set it to 2 weeks after Creation Date. This ensures customers are prompted to update their details within two weeks of being added to your database.
- Continue to > Launch your campaign: Confirm > Launch