How to upload contacts to TalkBox from a spreadsheet (in 5 steps).
Navigation: contacts > upload contacts.
Step 1: Format & save your spreadsheet
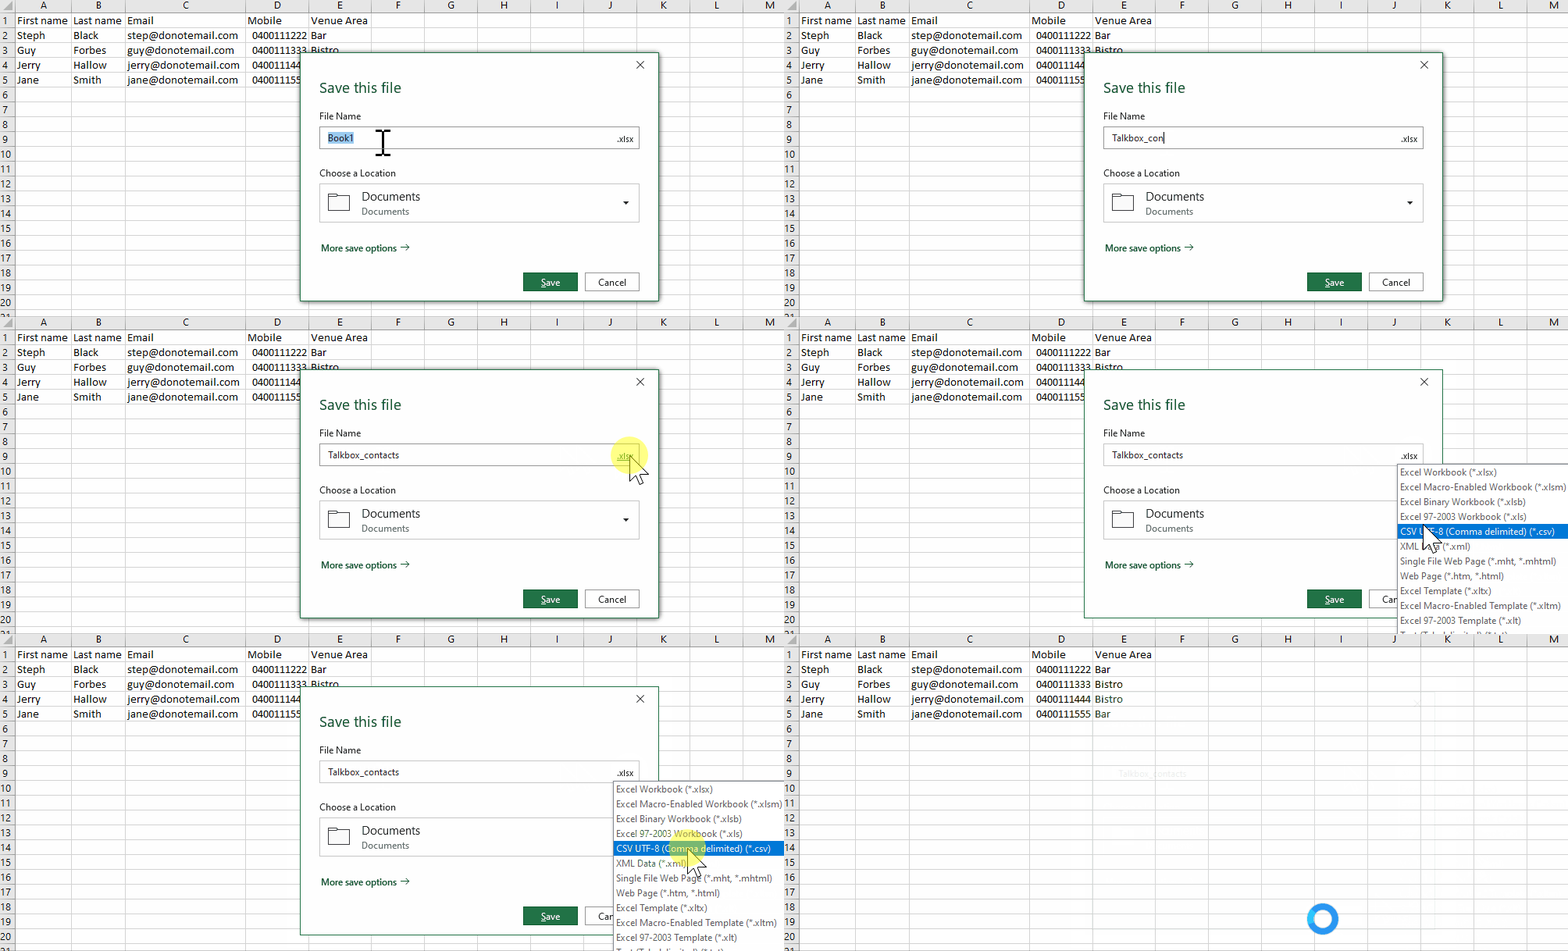
- Populate the first row of your spreadsheet with the field names. For example ‘First Name’, ‘Email’, ‘Mobile’, etc.
- Ensure there are no gaps between columns.
- Remove email hyperlinks if required.
- Use one sheet only.
- Save the file in CSV file format.

Step 2: Upload your contacts
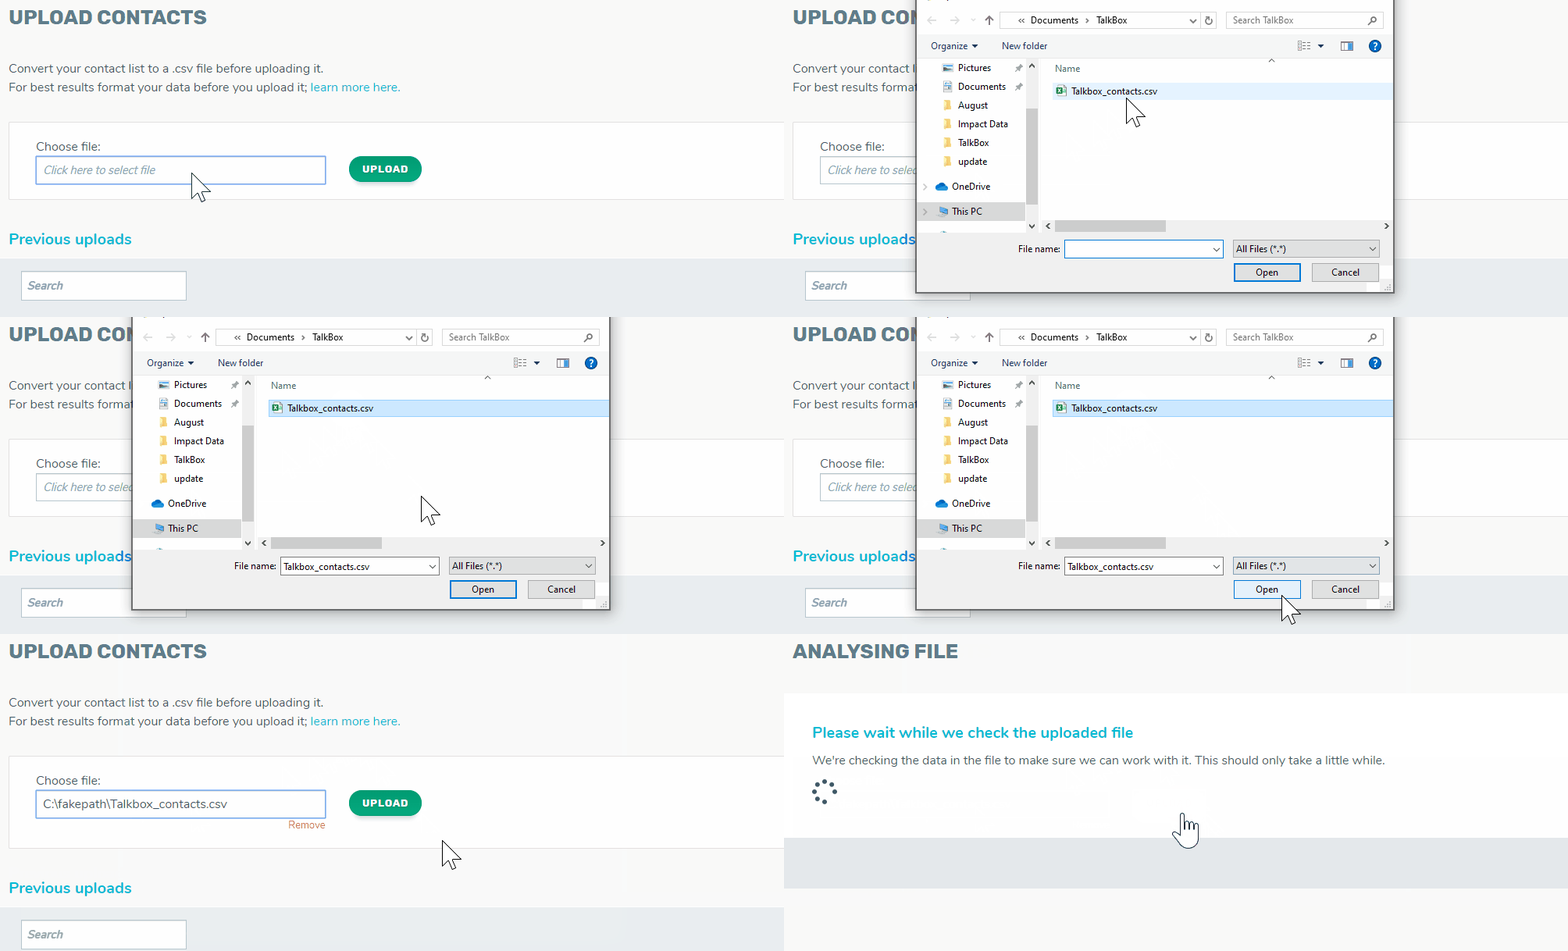
- Navigate to upload contacts (under the contacts tab on the Dashboard).
- Click the white area & select your saved csv file.
- Click upload.

Step 3: Tag your contacts
- Type your tag name into the blank space.
- Press enter to add a tag or select a previously used tag from the drop-down.
- Add as many tags as required.

Step 4: Map your fields
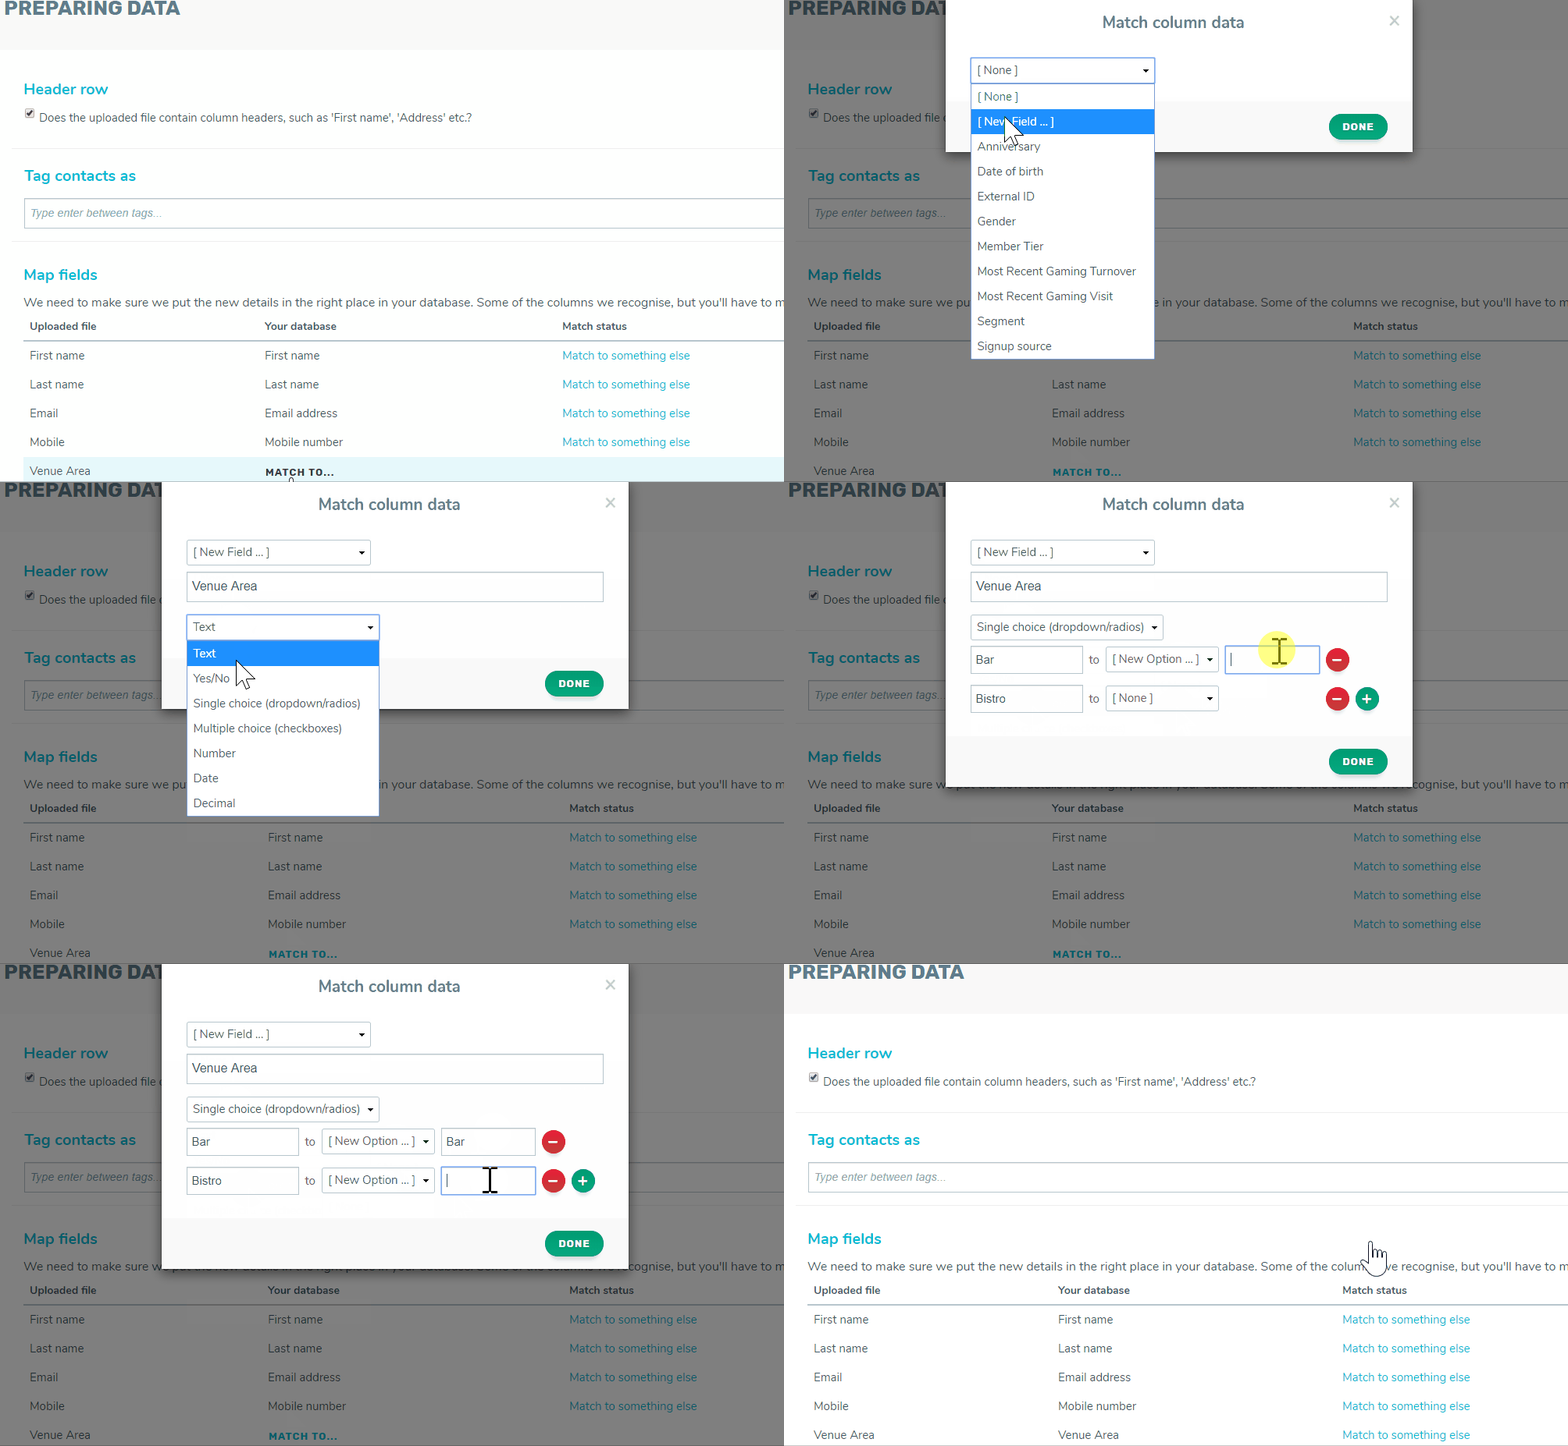
- Some fields will automatically be mapped based on the field name in your spreadsheet, check that these have been matched correctly.
- Some fields will not be mapped, select a field to map your data to or add a new field.

- Click continue once you’ve completed mapping fields.
Step 5: Let your upload process
- Allow anywhere from a few minutes to a few hours for your upload to complete, this will depend on the number of contacts being uploaded.
- Check when complete to get a report on the number of contacts created and updated.
Upload complete!
Read our tips on how to upload contacts correctly here.
Watch the next video on ‘creating an email’ here.
